Axios
MIME
即 media type,表示资源的类型,格式为
type/subtype
常见类型的有 text/plain, text/html, text/javascript, image/png...
MIME 分为两类,discrete 和 multipart,顾名思义,前者就是完整的一份资源,后者表示多个类型资源组合在一起,比如邮件中的多个附件。对于前端来说,最常见的 multipart 是 multipart/form-data,用在 POST 中。
介绍这个有什么用??因为 HTTP 是无状态的,不关心数据的格式,在它眼中都是二进制数据流。但是对业务来说,我们只需要知道收发数据的格式才能正确的处理数据。
Content-Type
在 HTTP 中,我们通过 Content-Type 指定资源的类型,即 MIME。格式为
Content-Type: media-type; charset?; boundary?
对于前端来说,常见的不外乎以下3种
application/x-www-form-urlencodedaplication/jsonmultipart/form-data
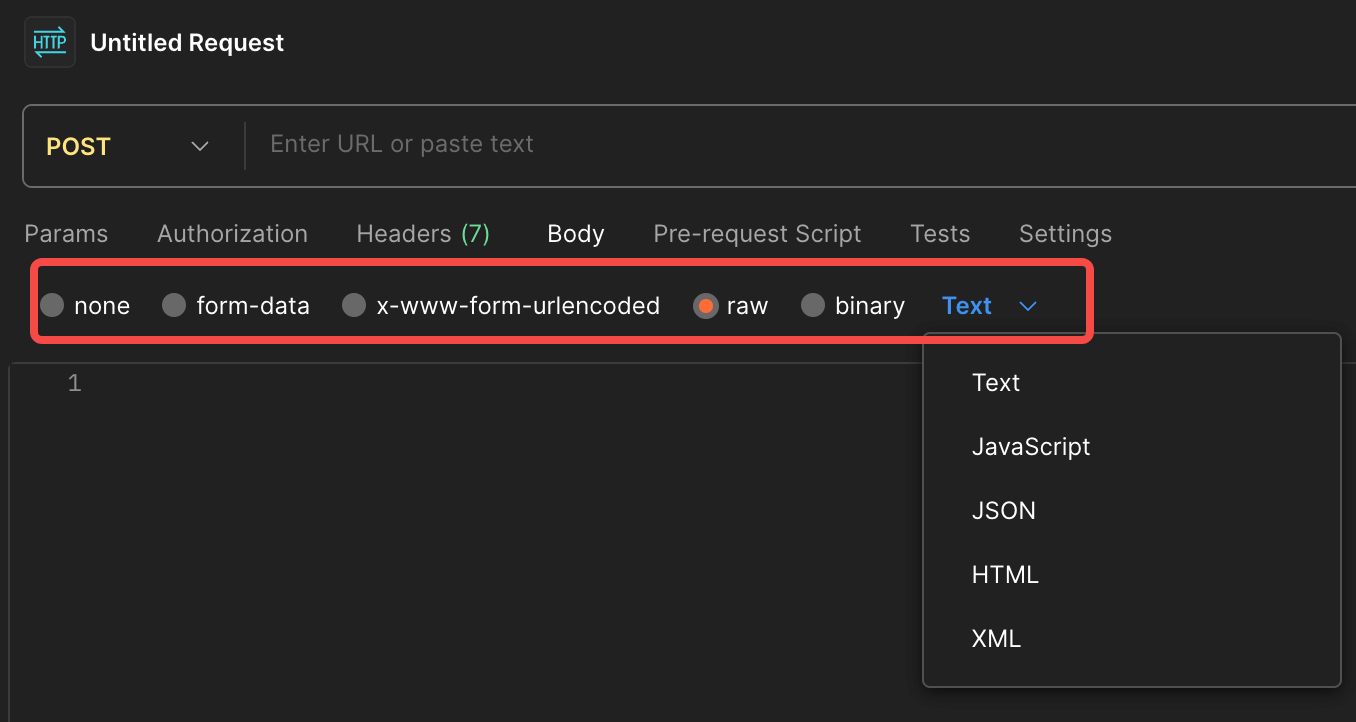
从 postman 中也能看出
具体看一下这几个类型的区别
application/x-www-form-urlencoded 会被 url-encode 通过 key=val&key1=val2 拼接起来,所以不适合二进制数据,比如上传文件
POST /test HTTP/1.1
Host: foo.example
Content-Type: application/x-www-form-urlencoded
Content-Length: 27

field1=value1&field2=value2
multipart/form-data 通过 boundary 发送多个数据片段,每个片段中资源的类型通过 Content-Disposition 指定
POST /test HTTP/1.1
Host: foo.example
Content-Type: multipart/form-data;boundary="boundary"

--boundary
Content-Disposition: form-data; name="field1"

value1
--boundary
Content-Disposition: form-data; name="field2"; filename="example.txt"

value2
--boundary--
Content-Disposition
Content-Disposition 主要有2中用法
消息主体的标头
这种场景下,第一个参数要么是 inline 表示以页面的一部分或者整个页面显示要么是 attachement 表示资源需要被下载到本地,可选 filename 被用作 『保存为』对话框中呈现给用户的默认文件名
Content-Disposition: inline
Content-Disposition: attachment
Content-Disposition: attachment; filename="filename.jpg"
multipart/form-data
在 multipart/form-data 中,第一个指令始终是 form-data,其后跟着 name 表示业务的字段key,可选 filename 表示文件名,也可以指定额外自定义的指令,指令名不区分大小写。
Content-Disposition: form-data; name="fieldName"
Content-Disposition: form-data; name="fieldName"; filename="filename.jpg"
Axios
实例化
根据官方文档,axios 既可以直接使用,也可以重新创建一个实例。
直接使用的话,axios 本身就能直接用,同时也有很多 alias methods 比如 get/post。
axios()
axios.request()
axios.get()
axios.post()
按这个逻辑去实现源码的话,大致是下面这样
// seg1
function request(cfg) {}
const get = (url) => { request({ url, method: 'get' }) }
const post = (url) => { request({ url, method: 'post' }) }

// seg2
function create() {
  const axios = request
  axios.get = get
  axios.post = post
  return axios
}
export default create()
看似能用,但总觉得怪怪的
1、后续扩展 delete/put 等方法,seg1 和 seg2 都要重复再写一遍
...
const put = (url) => { request({ url, method: 'post' }) }

function create() {
  // ...
  axios.put = put
  return axios
}
2、无法创建新的实例对象,即使再次调用 create() 也是指向同一个 request()
3、request() 本身扩展性不够灵活,缺少独立的上下文信息,就目前的设计,上下文信息是 global 级别的,无法扩展
针对以上问题,有以下改进方法
- 改为面向对象的模式,把
request抽象为一个类 get/post/...通过forEach自动扩展
但是还有一个问题,实例化 request 得到的就是一个对象,对象怎么又可以进行函数调用呢??
这一点可以借鉴 axios 的设计,原理就是通过 bind 绑定函数的上下文
function createInstance(defaultConfig) {
  const context = new Axios(defaultConfig);
  const instance = bind(Axios.prototype.request, context);

  // Copy axios.prototype to instance
  utils.extend(instance, Axios.prototype, context, {allOwnKeys: true});

  // Copy context to instance
  utils.extend(instance, context, null, {allOwnKeys: true});

  // Factory for creating new instances
  instance.create = function create(instanceConfig) {
    return createInstance(mergeConfig(defaultConfig, instanceConfig));
  };

  return instance;
}
根据他这个原理,我们可以写个自己的 demo
class Animal {
  constructor() {
    this.cate = 'animal'
  }

  action(n) {
    console.log('action:', n);
  }
}

['eat', 'stand', 'sleep'].forEach((method) => {
  Animal.prototype[method] = function () {
    return this.action(method)
  }
})

function createInstance() {
  const animal = new Animal()

  const instance = Animal.prototype.action.bind(animal);
  ['eat', 'stand', 'sleep'].forEach((method) => {
    instance[method] = Animal.prototype[method].bind(animal)
  })

  return instance
}
创建一个新的实例,也就显而易见了 axios.create(config)
interceptor
拦截器算是 axios 的核心逻辑了,分为
requestInterceptor,发起请求前执行,比如自定义headers,打印相关入参responseInterceptor,请求结束后执行,比如打印结果,计算接口耗时
他这个模式其实就是串行的一系列函数(本质是一个数组),串起了请求开始、发起请求、响应结束这3个阶段
看这个使用方式就不难猜底层是怎么实现
axios.interceptor.request.use(fn)
axios.interceptor.response.use(fn)
底层是有个 interceptorManager 维护一个函数数组,支持 push/pop/remove/clear 等方法,初始化 axios 的时候实例化2个 manager
class InterceptorManager {
  constructor() {
    this.handlers = [];
  }

  use(resolved, rejected) {
    this.handlers.push({
      fulfilled,
      rejected,
    });

    // 返回当前索引,作为 id
    return this.handlers.length - 1;
  }
  remove(id) {
    if (this.handlers[id]) {
      this.handlers[id] = null;
    }
  }
  clear() {
    if (this.handlers) {
      this.handlers = [];
    }
  }
  forEach(fn) {
    this.handlers.forEach((h) => h && fn(h)
  }
}
但是 axios 拦截器顺序有点奇怪
-
requestInterceptor是倒序,先注册后执行,后注册先执行 -
responseInterceptor是正序,先注册的先执行,后注册后执行
从源码可见确实如此,不是很明白倒序的原因
const requestInterceptorChain = []
this.interceptors.request.forEach(function unshiftRequestInterceptors(interceptor) {
  requestInterceptorChain.unshift(interceptor.fulfilled, interceptor.rejected);
});

const responseInterceptorChain = [];
this.interceptors.response.forEach(function pushResponseInterceptors(interceptor) {
  responseInterceptorChain.push(interceptor.fulfilled, interceptor.rejected);
});
runWhen
此外,请求拦截器本身自带2个属性 runWhen 和 synchronous,但是业务不怎么使用到。
runWhen 顾名思义就是满足指定条件才执行
this.interceptors.request.forEach(function unshiftRequestInterceptors(interceptor) {
  if (typeof interceptor.runWhen === 'function' && interceptor.runWhen(config) === false) {
    return;
  }
})
举个例子
axios.interceptor.request.use((cfg) => { return cfg }, undefined, {
  runWhen(config){
    return config.method == 'post'
  }
})
synchronous
注册 interceptor 的时候,如果不指定该参数,默认是 false;如果指定,必须每个 interceptor 都要设置为 true。那么,二者的区别在哪里?
1、false
axios 会生成一个 promise 链
const chain = [dispatchRequest.bind(this), undefined];
chain.unshift.apply(chain, requestInterceptorChain);
chain.push.apply(chain, responseInterceptorChain);

const promise = Promise.resolve(config);

while (i < chain.length) {
  promise = promise.then(chain[i++], chain[i++]);
}

return promise
每个 interceptor 都会顺序执行到,如果在这条链中出现异常,会被下一个 promise.catch() 捕获
2、true
相反,同步模式下,只要出现异常,就会 break 跳转到 disaptchRequest()
let newConfig = config

while (i < requestInterceptorChain.length) {
  const onFulfilled = requestInterceptorChain[i++];
  const onRejected = requestInterceptorChain[i++];

  try {
    newConfig = onFulfilled(newConfig);
  } catch (error) {
    // 跳出循环
    onRejected.call(this, error);
    break;
  }
}

try {
  promise = dispatchRequest.call(this, newConfig);
} catch (error) {
  return Promise.reject(error)
}
Adapter
因为 axios 同时支持在 brower 和 node,但是这两个端依赖的技术是不一样的(浏览器用的 xhr, node 端使用 http 模块),所以需要判断当前环境到底支持哪种能力,在 axios 中这种能力被抽象为 adapter。
不过相较于检测环境是否是浏览器、node端,更灵活的方式是检测特性
// xhr.js
export default (typeof xhr != 'undefined') && function (config) {
}

// node
export default typeof process != 'undefined'&& function (config) {
}
XHR
axios 其实就是根据 config 调用 xhr 不同的 api 而已
function (config) {
 return new Promise((resolve, reject) => {
   let requestData = config.data;

   let xhr = new XMLHttpRequest()

   xhr.open(config.method.toUpperCase(), buildURL(fullPath, config.params, config.paramsSerializer), true)

   xhr.timeout = config.timeout

   // 事件监听
   // 消息体封装
   xhr.onloadend = () => {
      settle(function _resolve(value) {
        resolve(value);
        done();
      }, function _reject(err) {
        reject(err);
        done();
      }, {
        data: responseData,
        status: request.status,
        statusText: request.statusText,
        headers: responseHeaders,
        config
      });

      xhr = null
   }
   xhr.onabort = () => {
     reject(new Error('aborted'))
     xhr = null
   }
   xhr.onerror = () => {
     reject(new Error('Network Error'))
     xhr = null
   }
   xhr.ontimeout = () => {
     reject(new Error('timeout'))
     xhr = null
   }

   //
   xhr.setRequestHeaders()

   xhr.send(requestData || null)
 ))
}
HTTP
取消请求
xhr.abort() 可以终止请求,问题是需要业务提供终止的时机。 对此,有2种方式解决,一种是 AbortController,一种是 axios 自己实现的 CancelToken
AbortController
const controller = new AbortController();

axios.get('/foo/bar', {
   signal: controller.signal
}).then(function(response) {
   //...
});

// cancel the request
controller.abort()
从上面的代码,可以看出 axios 内部必定监听了 abort event 然后在 callback 里调用了 xhr.abort
看源码确实如此
 if (config.cancelToken || config.signal) {
  onCanceled = cancel => {
    if (!request) {
      return;
    }

    reject()

    xhr.abort()
    xhr = null
  };

  if (config.signal) {
    config.signal.aborted ? onCanceled() : config.signal.addEventListener('abort', onCanceled);
  }
}
CancelToken
CancelToken 本质是 axios 自己实现的类似 AbortController 的一个类。
executor
当初始化一个 CancelToken 本质是初始化一个等待 fullfilled 的 promise,同时给业务提供 fullfilled 的方法
class CancelToken {
  constructor(executor) {
    this._listeners = []

    let resolvePromise;
    // 等待 fullfilled
    this.promise = new Promise(function promiseExecutor(resolve) {
      resolvePromise = resolve;
    });
    // 一旦 fullfilled
    this.promise.then(cancel => {
      if (!token._listeners) return;

      let i = token._listeners.length;

      while (i-- > 0) {
        token._listeners[i](cancel);
      }
      token._listeners = null;
    });
   }

   // 暴露 fulfilled 的方法
   executor(() => resolvePromise())
}
这段代码的模式出现在很多开源框架中,其实就2点
- 框架内部初始化一个等待
fulfilled的promise - 业务通过
executor闭包框架内部的cancel方法,而这个方式就是用来 fulfill promise的 - 采用发布订阅模式,在需要
cancel的时候,注册对应事件即可
axios 本身也提供了静态方法,方便业务不传 executor
static source() {
  let cancel;
  const token = new CancelToken(function executor(c) {
   cancel = c;
  });
  return {
    token,
    cancel
  };
}
订阅
if (config.cancelToken || config.signal) {
  onCanceled = cancel => {
    reject();
    xhr.abort();
    xhr = null;
  };

  config.cancelToken && config.cancelToken.subscribe(onCanceled);
覆盖 promise.then
查看 axios 的源码,可以看到 CancelToken 内改写了 promise.then
this.promise.then = onfulfilled => {
  let _resolve;

  const promise = new Promise(resolve => {
    token.subscribe(resolve);
    _resolve = resolve;
  }).then(onfulfilled);

  promise.cancel = function reject() {
    token.unsubscribe(_resolve);
  };

  return promise;
};
原因不明,我感觉应该是个语法糖,方便业务自定义自己的订阅事件。设想如果业务自己想订阅一下 cancel 也是这样的写法
const callback = () => {}

source.token.subscribe(callback)

// ...
source.token.unsubscribe(callback)
如果有多个事件岂不是很麻烦,要定义多个 callback 注册、取消注册,不符合 axios cancel的思想,如果用改写的 promise.then 就优雅很多
const { cancelB } = source.token.promise.then(() => {
  console.log('cancel me 2')
})

// 回调的时候,先执行,因为是订阅事件的调用是倒序的
const { cancelA } = source.token.promise.then(() => {
  console.log('cancel me 1')
})
针对此改写,我们可以写个 demo,体验一下
const source = axios.CancelToken.source()

axios.get('xxx', {
  cancelToken: source.token
})
setTimeout(() => {
  source.cancel()
}, 4000)
const { cancel } = source.token.promise.then(() => {
  console.log('controller promise done')
})
setTimeout(() => {
  cancel()
}, 2000)